
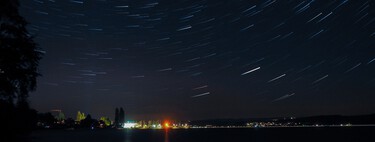
The Perseids: Capturing the Skies’ Spectacle
The Perseids are already here, and while there are still a few days to reach their peak activity, it is essential to keep in mind some tips and tricks for those who wish to capture them in a photograph. As many have learned, photographing meteor showers is not always easy.
NASA offers invaluable insights into this process, so why not benefit from their expertise?
Step One: Planning
To capture stunning images of this rain of stars , the first step is careful planning. The Perseids, also known as the Tears of San Lorenzo , can be seen for several weeks during the summer, approximately between June 17 and August 24. They reach their peak around August 11 and 12 .
Choosing the right time and location is critical in overcoming the major enemy of astrophotography: light pollution . Avoiding full moons and their bright phases is advisable, as their light can significantly reduce the contrast needed to see these fleeting stars. City lights contribute to light pollution, so planning a trip to a more remote area can enhance your chances of witnessing this celestial event.
Moreover, knowing where to look is vital. The Perseids appear to radiate from the constellation Perseus . Familiarizing yourself with Perseus will help you focus your camera’s lens more effectively, thereby increasing your odds of capturing the meteors.
Step Two: The Equipment
A tripod can be incredibly beneficial for astrophotography. Long exposure times are often necessary, and any involuntary movements can ruin a perfect shot. If you don’t have a tripod, you can create your own solution by stabilizing your camera on a rock or another sturdy surface, though this may limit your flexibility.
An external trigger is also advantageous as it helps avoid camera shake, but you can easily use a camera timer as an alternative.
Considering your lens choice is crucial. NASA recommends using a wide-angle lens . You won’t know exactly when or where the next flash will happen, so a wider field of view increases your chances of capturing those elusive meteors.
Step Three: Preparation
Once you’re set up and in position, it’s time to locate the constellation Perseus . Orienting your camera towards this constellation boosts your chances of capturing meteor flashes.
Setting your camera to manual focus mode is best. Automated focus systems can struggle in low-light conditions, and as you won’t be changing your focal point, manual focus is ideal. It is advisable to experiment with slight adjustments in case focusing on infinity isn’t yielding satisfactory results.
Long exposures are essential for capturing these shooting stars . Determining the appropriate exposure length can also require some fine-tuning, but NASA has provided a handy tool known as the Rule of 500 . This involves dividing 500 by the lens’s focal length, providing you with the ideal exposure time in seconds. For example, if you’re using a 20mm lens, your calculation would be 500/20, giving you a 25-second maximum exposure time before star trails become visible due to Earth’s rotation.
Experiment and Enjoy
The Rule of 500 serves as a solid starting point; however, making adjustments to your ISO settings and aperture values can allow for creative exploration with shorter exposure times. Small adjustments to these settings can significantly influence the overall quality and aesthetics of your images.
The final advice from NASA is simple: enjoy the experience. These astronomical events offer a unique opportunity to view the night sky in a new light, accentuated by the unexpected flashes that streak across the sky during those warm summer nights.
The Perseids not only provide a stunning visual spectacle but also an exciting challenge for photographers. Whether you’re a seasoned pro or a budding astrophotographer, this is an occasion to embrace. Take your gear, find a dark spot, and enjoy the cosmic show!
Image Credit: Fatih Turan